Showing posts with label DIY. Show all posts

Tuesday, September 15, 2015

guest bathroom {remodel}

Hello! I am so proud of this guest bathroom remodel that I'm blogging about it and it takes a lot for me to take the extra time to blog after a project these days! 

Kevin and I really worked more together on this room/project than any previous project/redo and I really feel like we are getting the hang of tearing stuff up and making it our kind of pretty :)

Most importantly, here is the finished project:


Can you really appreciate the finished product with out some good 'ol before and afters??? 
I hardly think so...


And just so you don't think this was a 2 day HGTV redo I'll throw in some progress pics that are between week 2 and month 2! 
We actually finished this project faster than any other room we've redone... about 5 months from start to replacing the light switches (replacing the light switches typically takes us a whole year to decide it's finally worth the effort to do!).


The Top 3 things I love most about the new bathroom:

1. The bathtub is bigger! 2" higher and 2" wider, and it's amazing!
2. My custom barn wood mirror by Kelsey Farms... I felt like Joanna Gains for this remodel "let me just have my personal carpenter whip this up for me..."!
3. Everywhere I look, I'm reminded how skilled Kevin is at making what's in my head come to life!


Come visit, it's been a month now so I might rescind the "no bathroom use" restrictions - You're probably rolling your eyes, but the bathroom was perfectly pristine! I had to maintain that status for as long as possible!!!


Resource list:
Floor: Sausalito ceramic tile from Lowes
Vanity Paint: Naval by Sherwin Williams color matched in Valspar by Lowes
Vanity Top: Style Selections Cultured Marble from Lowes
Vanity Hardware: Lowes
Bathtub: Vikrell tub and surround from Lowes
Barnwood Mirror: Custom made by Kelsey Farms
Ladder above toilet: custom made by Kevin & Abby
Basket on ladder: Michael's
Small boxwood wreath: Jeffrey Alans
Hand Towel: TJ Max
Small Clear Mirror: TJ Max
Terrarium: Pier 1
Towel Hooks: Hobby Lobby
Jesus Artwork: Hobby Lobby
Shower Curtain: Kenneth Cole from Bed Bath and Beyond
Shower Head and Faucet: Pfister from Home Depot
Magazine basket: Gordman's
Wall Paint: Ancient Marble by Sherwin Williams
Vanity Light: Archie Venetian from Lowes
Exhaust Fan with Light: Utilitech from Lowes
Vent Cover: Allen and Roth from Lowes
Walls: Wrong side of 8" car siding from Menards
Toilet: Lowes
Door and Door Hardware: Menards


Friday, April 6, 2012

pillows for klarisa

I have a friend who is my pinterest soul-mate. That sounds pretty intense, but basically, everything Klarisa pins I want to pin... and do and make. That is not meant to be creepy and I could have just said "Klarisa has good taste", but I hardly feel like that covers the depth of my appreciation for her hunting out the good stuff or the speed with which I click repin. Haha!


To show my appreciation, I made 3 pillows for Klarisa that we had both pinned close to the beginning of our pinning days. 

The first (and my favorite) is this cute little bird pillow found via pinterest, but origionally from this cool etsy shop. This is my version:


Next is this pretty ruffle flower pillow.
(I do not have a direct link for this pillow. I read & combined several tuturials found via pinterest - my DIY instructions are below)


Finally, I made a kite pillow in the same style as the bird pillow and inspired from the same etsy shop


I love how cute they all are!


Here's my steps for making the purple flower pillow - it's so easy and fun I feel guilty for not making letting Klarisa do it herself!


I cut several 2" strips of stretchy soft fabric (like jersey material, but I used the less expensive version)


I believe I ended us using 5 strips, but how much you need/use depends on the size of your pillow.


Then I sewed down the middle of the strips of fabric on my largest stitch setting to create a "ruffled" strip.


At frist I sewed my strips together, but then I found it was easier to work with them if I had somewhat shorter pieces and it did not change the end results/look - so I would skip that step next time.


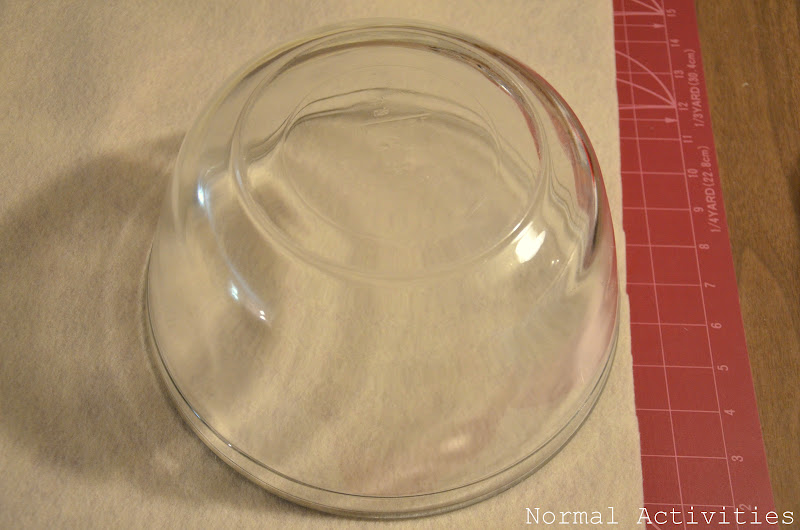
Next I used a large kitchen bowl as a circle pattern.


And cut a circle out of felt for my flower base.


It's time for flower asembly!

Fold the ruffled strips in half, so that the stitching is at the base.


and start hot gluing. Apply the glue to the felt circle and then press the strips of folded fabric (at the base where the stitching is) to the felt.
I started at the center of my circle, but saw tutorials that started from the outside instead.
I'll have to try that next, and give an update if I find one way is easier than the other.


Sorry I didn't take good pictures during the glue stage, but I had to keep moving!

Here I am holding back the previous layer of ruffles so I can glue the next layer a little closer for a fuller look.


To finish the pillow, I just trimmed the felt as close as possible and glued it to a pillow front. I used hot glue for this step and immediately put a heavy book on the glued flower to help is set flat.


Isn't is just so pretty and ruffly?!?!


And here is another bird pillow shot just b/d it's still my favorite!


shared at whipperberry.com


Sunday, March 11, 2012

you are my sunshine, my lovely sunshine

You are my sunshine, my lovely sunshine...


I instantly fell in love with this pillow I found via pinterest


it's origionally from here, but it was a wee bit of a luxery item at $159!

Then I saw this great tutorial, also via pinterest, for the same style pillow.

I've never loved using stencils because I have a hard time getting everything lined up and looking as neat and straight as I want it to, but I kept thinking about this pillow and then a lightbulb went off!!! I used scrapbooking letter stickers instead of a stencil, it was easy and I love how it turned out!


Here's the breakdown of how I did it:

I cut an 18" square of fabric (for a 18" pillow form) and taped it to a 17" square piece of cardboard.


Here's the front


and here's what the back looked like at that point.


Next, I marked off even sections with a water soluble pencil (so I'd be sure to have straight lines across the pillow). I'm somewhat of a perfectionist, but I don't think this step was necessary and would skip it next time because of how well the ruler worked in the next step.


I used a ruler and placed my letter stickers how I wanted them to look (there are lots of different styles of letter stickers in the scrapbooking isle and they are only about $1.50 a package when Hobby Lobby does their half price sale).


The stickers provided a great visual and I was able to move them around a little until I had everything to my liking before I made any permanent marks on my fabric.


I then used a fine point fabric marker to outline the letters,


once all the outlining was done I removed the stickers,


and filled in the letters with a larger tip fabric marker


I heat set the pillow front by ironing it, attached a pillow back with a zipper enclosure and washed out the water soluble pencil lines.


Now I have a great pillow to prettify my deck!!!


You are my sunshine
my lovely sunshine
you make me happy
when skys are grey
you will know dear
how much I love you


Just another installment in my pinterest

Image Detail

project resolution challenge!
(see here)