Showing posts with label flower pillow. Show all posts

Friday, April 6, 2012

pillows for klarisa

I have a friend who is my pinterest soul-mate. That sounds pretty intense, but basically, everything Klarisa pins I want to pin... and do and make. That is not meant to be creepy and I could have just said "Klarisa has good taste", but I hardly feel like that covers the depth of my appreciation for her hunting out the good stuff or the speed with which I click repin. Haha!


To show my appreciation, I made 3 pillows for Klarisa that we had both pinned close to the beginning of our pinning days. 

The first (and my favorite) is this cute little bird pillow found via pinterest, but origionally from this cool etsy shop. This is my version:


Next is this pretty ruffle flower pillow.
(I do not have a direct link for this pillow. I read & combined several tuturials found via pinterest - my DIY instructions are below)


Finally, I made a kite pillow in the same style as the bird pillow and inspired from the same etsy shop


I love how cute they all are!


Here's my steps for making the purple flower pillow - it's so easy and fun I feel guilty for not making letting Klarisa do it herself!


I cut several 2" strips of stretchy soft fabric (like jersey material, but I used the less expensive version)


I believe I ended us using 5 strips, but how much you need/use depends on the size of your pillow.


Then I sewed down the middle of the strips of fabric on my largest stitch setting to create a "ruffled" strip.


At frist I sewed my strips together, but then I found it was easier to work with them if I had somewhat shorter pieces and it did not change the end results/look - so I would skip that step next time.


Next I used a large kitchen bowl as a circle pattern.
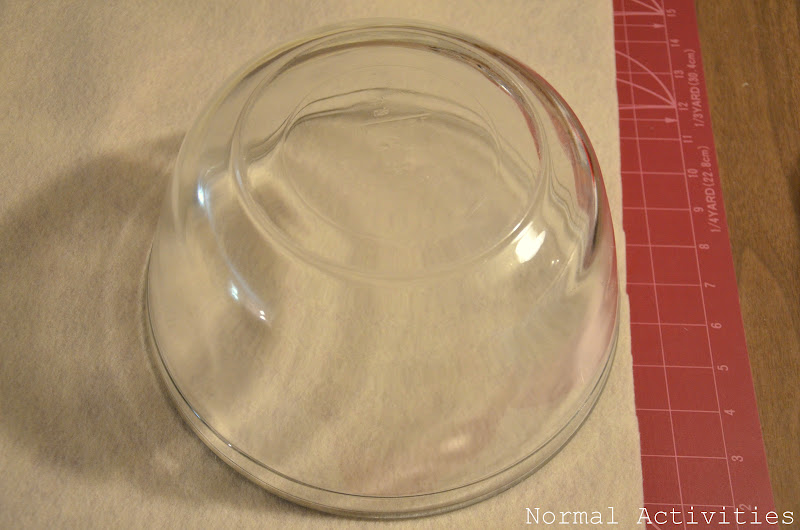


And cut a circle out of felt for my flower base.


It's time for flower asembly!

Fold the ruffled strips in half, so that the stitching is at the base.


and start hot gluing. Apply the glue to the felt circle and then press the strips of folded fabric (at the base where the stitching is) to the felt.
I started at the center of my circle, but saw tutorials that started from the outside instead.
I'll have to try that next, and give an update if I find one way is easier than the other.


Sorry I didn't take good pictures during the glue stage, but I had to keep moving!

Here I am holding back the previous layer of ruffles so I can glue the next layer a little closer for a fuller look.


To finish the pillow, I just trimmed the felt as close as possible and glued it to a pillow front. I used hot glue for this step and immediately put a heavy book on the glued flower to help is set flat.


Isn't is just so pretty and ruffly?!?!


And here is another bird pillow shot just b/d it's still my favorite!


shared at whipperberry.com


Saturday, January 14, 2012

o christmas tree... pillow project!

Ok ok, I know this is a Christmas project - meaning I'm a total slacker when it comes to blogging in a timely fashion, but better late than never... right?

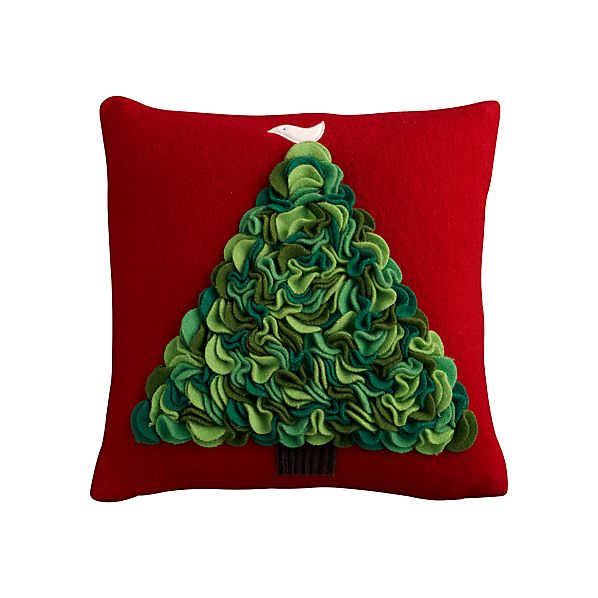
My friend showed me this cute pillow from crate & barrell... she wanted help to figure out how to make it for her mom for Christmas. Hers turned out so well, that I decided to make one for Kevin's mom too!

Image Detail


This is how mine turned out!


Supplies:
1/2 yard red felt
1/4 each of 3 different shades green felt
scrapes of brown felt
18" pillow form
star button
matching thread


First cut 2 18"x18" squares of red felt for the pillow front and back.
Then cut a tree pattern out of paper. My tree measured 11" across the bottom and is 11" high.


Trace the tree pattern onto one of the 18"x18" red squares and add a tree base.


Cut 2" circles out of the green felt. I used about 60 circles of each shade.
Cut 1 1/2" circles out of the brown felt I used about 20 total.


To begin sewing, take a circle


fold the circle in half


and then in half again so you have a quarter circle showing now


hand sew at the corner of the circle, going through all four layers & attaching it to the 18"x18" pillow front. Sew around the outline of the tree first and then fill in the rest of the tree. Add the brown for the trunk and then the button star to the top.


Sew the front & back of the pillow together and stuff with the pillow form. Make sure to leave a large enough opening for the pillow form because felt stretches easily.


This was such a fun project to do and it looks so festive!


Have fun making your own... you know you want to!


Fun enough to share on:


Wednesday, September 7, 2011

rocking chair redo complete !!!

Back in the very beginning of summer I posted about this rocking chair I had snagged at a garage sale for $5, for the purpose of attempting to participate in the furniture refinishing craze. My friend Annie, from Living Life with the Klinkners was my partner in crime the whole way through this redo.


I am in love with how our first ever furniture redo turned out!!! It's not perfect, but I learned something every step of the way and am excited to keep an eye out for more pieces of furniture that could use some TLC.


Annie is going to share our first couple of steps, the sanding and priming, here... so no scrolling down until you check it out.

...


...


...


...


...


...


Once we were all sanded and primed it was time to break out the color. We decided we wanted a "statement" color. Annie and I both tend to select "safe" colors so we wanted to use this opportunity to really step out and play with something bold!


We made sure we were good and set up (with our paint brushes and wine glasses and Dexter-like garage setting) before we popped open the paint can.


The color we finally selected was "swizzle stick" by Valspar's Allen Roth collection and I think it was a perfect choice!!! (It's definately prettier in person than it's showing up in my pictures)


Here's our first coat. We painted with brushes instead of a sprayer due to the cost factor. The paint went on very easily though, so I don't think we really missed having a sprayer at all!


Here's after the second coat


We ended up applying about 4 coats of paint and then we used a clear poly coat in a spray can to finish the job. We applied the poly in light even coatings and used 3 cans to do 3 coats on the rocker.


After all that we had this beautiful glistening rocker!!!


I just love how the paint brings out the special details on the rocker


With everything turning out so well, I just knew I had to add pillows, which I wanted to make by following tutorials I'd been seeing on some of the blogs I read.


Here's our rocker decked out with the fancy pillow swag I made!


Pillow detail shot


For the seat cushion I was able to get a super clearanced cushion at Pier1 which I used as a pattern and then the interior of my rocker seat cusion. I just added ruffles b/c I love them!


Here's a shot of ties in the back


I followed this tutorial for my flower pillow and just made it smaller by using a 14" pillow form.


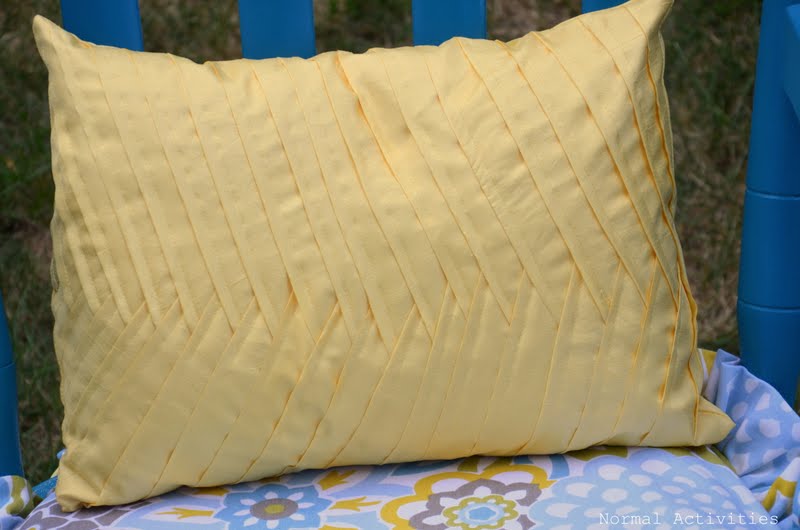
And I followed this tutorial for my herringbone pillow
(mine's a little rough though, I'm gonna have to give this one another try in the near future)


So what do you think??? Do you love how it turned out as much as I do???
Are you at least going to give these awesome pillow tutorials a try???


This is being linked to:


missmustardseed.blogspot.com

and